Rust is not one problem with one price. A blister on a detachable wing may be manageable; corrosion in a sill, chassis rail or suspension mounting can change the safety, cost and viability of the entire project. This guide explains how to inspect a classic or project car methodically before buying.
Cosmetic rust versus structural corrosion
Surface corrosion
Light oxidation on exposed steel may be removable without replacing metal, provided the panel remains sound and the source of moisture is addressed.
Panel-edge corrosion
Rust around lips, seams and window openings often starts between layers. The visible blister may represent a larger repair once trim and paint are removed.
Structural corrosion
Weakness in sills, chassis members, floors, bulkheads or mountings can affect vehicle integrity and require accurate cutting, fabrication and welding.
Do not judge seriousness by the size of the visible mark. Corrosion expands between overlapping panels and beneath coatings. A small bubble at a sill end can lead into an inner sill, reinforcement and floor edge; a larger rusty patch on a bolt-on wing may be simpler.
Understand how the car carries its loads
Most later classics use a monocoque or unitary body in which the shell itself provides structure. Earlier vehicles, many off-roaders and some specialist cars use a separate chassis carrying the body. Kit and modified cars may use a purpose-built frame or retain significant parts of a production monocoque.
Identify the construction before inspection. On a monocoque, sills, floors, pillars, bulkheads, inner wings and suspension mounts often work together. On a separate-chassis vehicle, the visible body can look presentable while the chassis rails, crossmembers and outriggers are badly weakened.
What to take to a rust inspection
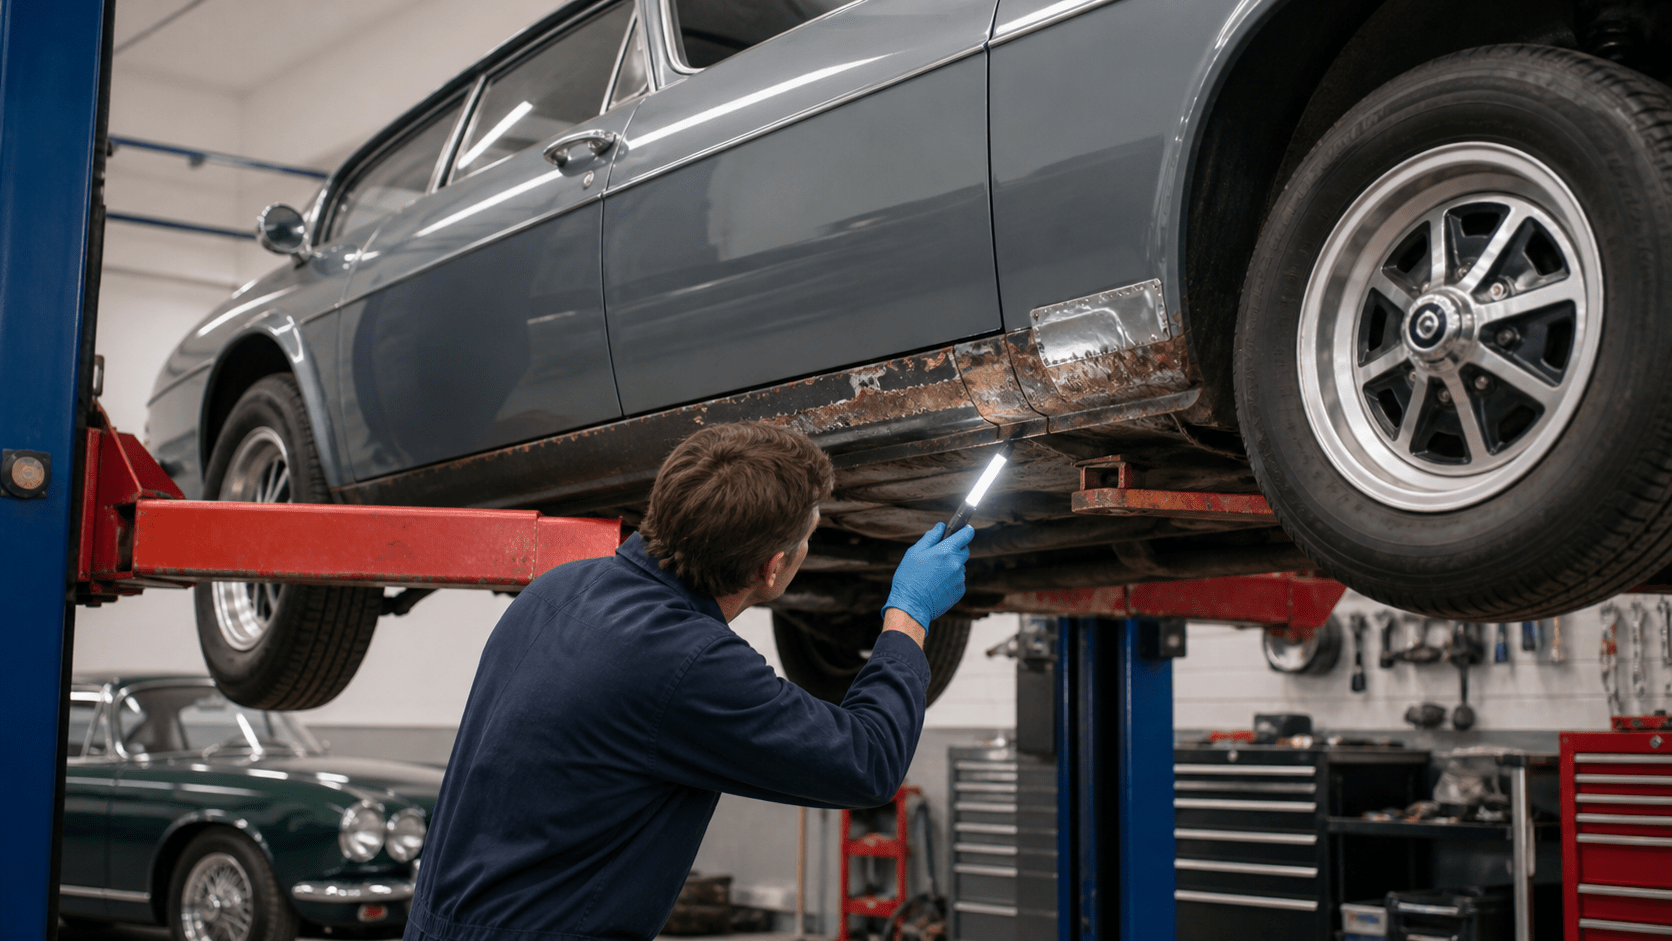
- Bright inspection torch: preferably compact enough for wheelarches, floors and cavities.
- Clean gloves and old clothing: so you can inspect low areas without rushing.
- Kneeling mat or clean ground sheet: only for viewing where there is safe access—never crawl beneath an unsupported car.
- Small mirror: useful behind lips and around mounting points.
- Phone or camera: photograph defects and review them away from the excitement of the viewing.
- Model-specific checklist: owners’ clubs and specialists know where each design traps water.
- Magnet or paint-depth gauge: use only with the seller’s permission and carefully enough not to mark the finish.
A screwdriver is not permission to stab another person’s car. Visual inspection, light finger pressure where appropriate and non-destructive tools can reveal much. If invasive testing is needed, agree it explicitly or arrange a professional inspection.
Inspect in the right conditions
View the car dry, clean and in daylight if possible. Rain and fresh washing hide paint texture, stains and filler edges. A dark cramped garage makes underside assessment difficult. Ask in advance whether a lift or inspection pit is available; a professional pre-purchase inspection is valuable when the car’s price or restoration risk justifies it.
Look at the whole car before individual rust spots. Uneven ride height, inconsistent door gaps, doors that need lifting, cracked paint near pillars and distorted panel lines can indicate structural movement or poor previous repair.
The major corrosion zones
Work from the ground upwards
- Sills and jacking points: inspect outer panels, seams, ends, inner sill areas and the relationship with floors and pillars.
- Floors and chassis members: check footwells, seat mounts, floor edges, chassis rails, crossmembers and previous patches.
- Suspension and steering mountings: examine turrets, spring seats, subframe mounts, control-arm points and the surrounding structure.
- Bulkheads and inner wings: look beneath batteries, reservoirs and soundproofing and around master cylinders, heater boxes and seams.
- Wheelarches: inspect inner and outer lips, tub seams, mud traps and the areas behind liners.
- Doors and pillars: check door bottoms, hinge mountings, latch areas, A-, B- and C-pillars and surrounding seals.
- Boot and rear structure: lift carpets and spare wheels; inspect tank surrounds, rear spring mounts, seams and water entry points.
- Windscreen and window apertures: bubbling near rubber seals can lead to hidden aperture corrosion and water-damaged interiors.
- Front valance, headlamp bowls and panel returns: debris and overlapping panels trap moisture where the exterior still looks tidy.
- Separate chassis: pay particular attention to boxed sections, outriggers, suspension mounts and areas concealed by bodywork.
Inside the cabin and luggage areas
Smell the interior before it has been aired. Damp, mould and recent heavy fragrance can indicate water ingress. Lift loose mats and removable carpets with permission. Check for staining, swollen fibreboard, corroded seat runners and rust around seat-belt anchorages.
Water may enter at windscreens, door seals, heater intakes, sunroofs and body seams before collecting at the lowest floor point. Repairing the floor without stopping the leak merely restarts the process.
How to read paint, filler and underseal
Stand back and compare colour, gloss and texture across adjacent panels. Look along reflections for ripples, sanding marks and abrupt changes. Overspray on seals, wiring, fasteners or suspension suggests quick masking rather than thorough dismantling.
A magnet can indicate areas with substantial non-magnetic filler on a steel panel, but results are affected by paint thickness, panel curvature and the tool used. Aluminium, glassfibre and factory-applied materials require different interpretation. A reading is a clue, not a verdict.
Fresh underseal may be legitimate protection after a documented repair. It can also conceal weak metal, moisture or untidy patching. Ask for photographs taken before, during and after structural work, plus invoices identifying who performed it.
Judging previous welding
Encouraging evidence
- Repair extent is documented with photographs.
- Corroded metal was cut back to sound material.
- Panels align and original drain paths remain effective.
- Welds and finishing are consistent with the location and repair method.
- Both sides of the repair received suitable protection where accessible.
Reasons for caution
- Small overlapping patches accumulate over earlier rust.
- Heavy sealant or underseal hides every edge.
- Heat distortion, pinholes or incomplete seams are visible.
- Repairs obstruct drains or trap water between layers.
- Fresh paint appears only around a test-sensitive area without supporting records.
Appearance alone cannot prove structural quality. When a mounting point, chassis member, sill reinforcement or other safety-critical area has been repaired, use a qualified body specialist if you cannot assess it confidently.
Use MOT history as a corrosion timeline
Read the official MOT history before viewing. Repeated corrosion advisories, changing descriptions around the same corner and a sudden clean result after many failures deserve questions and inspection. Equally, a historic failure followed by documented high-quality restoration can be reassuring.
The current DVSA MOT inspection manual includes a dedicated appendix on structural integrity and corrosion. GOV.UK also explains that an MOT checks excessive corrosion or damage in specified areas but is not the same as a general mechanical service or restoration appraisal.
Estimate rust repair before negotiating
Separate each defect into investigation, fabrication or replacement panels, welding, corrosion protection, paint preparation, paint and reassembly. A replacement sill panel’s price is rarely the repair total: the inner structure may need rebuilding and adjacent trim, glass or mechanical parts may require removal.
Send clear photographs to a specialist familiar with the model, while accepting that no remote quotation can guarantee what lies beneath paint. For substantial corrosion, arrange an in-person assessment or base your offer on a worst-reasonable scenario with contingency.
When should you walk away?
- The seller prevents reasonable inspection or refuses access to known problem areas.
- Structural corrosion is extensive but the price assumes a simple cosmetic repair.
- The shell has visibly moved, important mountings are weakened or repairs appear unsafe.
- Fresh coatings conceal the underside and no photographs or invoices support the work.
- Rare missing panels and structural sections cannot be bought or economically fabricated.
- Your storage, welding skills, professional budget or timescale do not match the project’s needs.
Walking away is not failure. It preserves the budget and space for a project whose condition, price and demands fit you better.
Printable classic-car rust inspection checklist
Before the viewing
- Model-specific corrosion points researched
- MOT history studied for recurring advisories
- Daylight, dry inspection requested
- Lift or specialist inspection discussed
- Torch, mirror, gloves and checklist packed
Structure and underside
- Outer and inner sills checked
- Jacking points and floor edges checked
- Chassis rails and crossmembers checked
- Suspension and steering mounts checked
- Bulkheads, inner wings and subframe mounts checked
- Previous repairs photographed
Body and water traps
- Wheelarches and panel lips checked
- Door bottoms and pillars checked
- Windscreen and window apertures checked
- Boot floor and spare-wheel well checked
- Battery tray and heater areas checked
- Drain holes and seams checked
Evidence and budget
- Paint texture, overspray and filler clues recorded
- Fresh underseal questioned
- Repair photographs and invoices reviewed
- Panel availability researched
- Professional metalwork and paint estimated
- Contingency added before making an offer
Use the complete buying checklist at the viewing, calculate the likely restoration cost and compare current projects in the hub.
Project-car buying checklistRestoration-cost guideProject Cars hub